Hardware Requirement
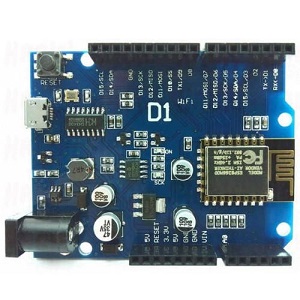
Microcontroller: Wemos D1 R2 Wifi -Esp8266 Development Board
Motor driver: L298N module
Motor: DC 3-6v BO Gear Motor With Plastic Tire Wheel
External Power: Battery - 9V
Robot Chassis
Software Requirement
Arduino IDE
WIFI Controlled Mobile Application
Hardware Specification
Wemos D1 R2 Wifi -Esp8266 Development Board
WEMOS D1 is a WIFI development board based on ESP8266 12E. The functioning is similar to that of NODEMCU , except that the hardware is built resembling Arduino UNO. The D1 board can be configured to work on Arduino environment using BOARDS MANAGER.
So,its not necessary to use a separate Arduino board , the D1 itself can be programmed on Arduino IDE.This is handy in using with IOT projects. Further many Arduino SHIELDs are compatible with the D1 board.
Different versions of D1 boards are available in the market R1,R2 and MINI, As the name implies D1 Mini is a smaller version R1 , R2 boards look like Arduino UNO board ,but version is not printed on board. On some boards WEMOS D1is printed , as the ESP12 chip is manufactured by WEMOS. In some other boards it is printed just D1 ,where the ESP12 chip is that of AI Thinker.
Features
Easy application programming using open source IDE
Easy to learn Microcontroller using Arduino boards
256k Flash
Easy application programming using open source IDE
Ready Library for most of sensors and application modules
Specification
ATmega328 Controller
Digital IO 13
PWM Channel 6
Working Freq. 16MHz
DC current / IO 40mA
DC current / IO 50mA (3.3V)
Input Voltage 6V to 20V DC
Flash 32Kb
SRAM 2Kb
EEPROM 1Kb
How to upload code in Wemos D1 R2 Wifi -Esp8266 Development Board
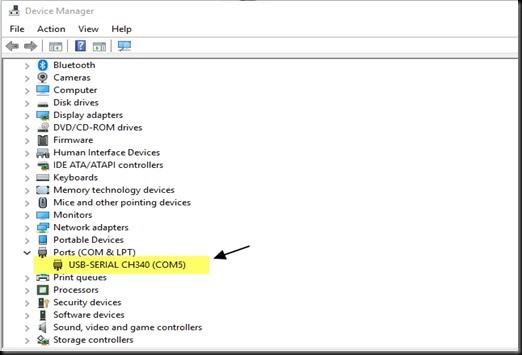
Use a MicroUSB cable to connect D1 with PC. Make sure that the cable is capable of handling both Data & power (some of the mobile cables can handle only power & not data) . Open the DEVICE MANAGER & note the COM PORT allotted to the module. As the serial chip used on D1 is CH340 , you need to install the corresponding drivers.
 Open the Arduino IDE & select this COM port.
From TOOLS —> BOARDS —> BOARDS MANAGER install the package for ESP8266.
Prior to this , you need to provide the link from where the Boards manager will look for the package.
To do this copy the following Link
http://arduino.esp8266.com/stable/package_esp8266com_index.json
Go to FILE –> PREFERENCES on Arduino IDE
Paste the link against the Additional Boards Manager URLs ,seen at the bottom of preferences screen & click OK.
Open the Arduino IDE & select this COM port.
From TOOLS —> BOARDS —> BOARDS MANAGER install the package for ESP8266.
Prior to this , you need to provide the link from where the Boards manager will look for the package.
To do this copy the following Link
http://arduino.esp8266.com/stable/package_esp8266com_index.json
Go to FILE –> PREFERENCES on Arduino IDE
Paste the link against the Additional Boards Manager URLs ,seen at the bottom of preferences screen & click OK.
 Now open the TOOLS –> BOARDS –> BOARDS MANAGER
Now, Search for ESP8266
Now you will find the package from ESP8266 Community.
Select the latest version from drop down & install it.
It takes a while & requires internet connection.
Once the package is installed ,you can see the list of boards under TOOLS –> BOARDS
Select the board as WEMOS D1 R1.
Select UPLOAD speed as 115200 &Programmer as USBASP
Now open the TOOLS –> BOARDS –> BOARDS MANAGER
Now, Search for ESP8266
Now you will find the package from ESP8266 Community.
Select the latest version from drop down & install it.
It takes a while & requires internet connection.
Once the package is installed ,you can see the list of boards under TOOLS –> BOARDS
Select the board as WEMOS D1 R1.
Select UPLOAD speed as 115200 &Programmer as USBASP

L298N Motor driver module
This dual bidirectional motor driver is based on the very popular L298 Dual H-Bridge Motor Driver IC. This module will allow you to easily and independently control two motors of up to 2A each in both directions.

Features
This module has a built-in 5v power supply, when the driving voltage is 7v-35v, this supply is suitable for power supply, DO NOT input voltage to +5v supply interface, however ledding out 5v for external use is available.
When ENA enable IN1 IN2 control OUT1 OUT2
When ENB enable IN3 IN4 control OUT3 OUT4
Specification
Double H bridge drive
Chip: L298N (ST NEW)
Logical voltage: 5V
Drive voltage: 5V-35V
Logical current: 0mA-36mA
Drive current: 2A (MAX single bridge)
Storage temperature: -20 to +135
Max power: 25W
Weight: 30g
Size: 43 x 43 x 27mm
DC 3-6v BO Gear Motor with Plastic Tire Wheel
A DC Geared DC motor is a simple DC motor with gear box attached to it
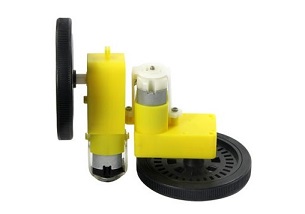
Features
Center hole: 5.3MM x 3.66MM
Wheel size: 65 x 26mm
Specification
Voltage: DC 3V-6V
Current: 100 MA-120MA
Reduction rate: 48: 1
RPM (With tire): 100-240
Tire Diameter: 65mm
Car Speed(M/minute): 20-48
Motor Weight (g): 29/each
Motor Size: 70mm X 22mm X 18mm
Noise: <65dB
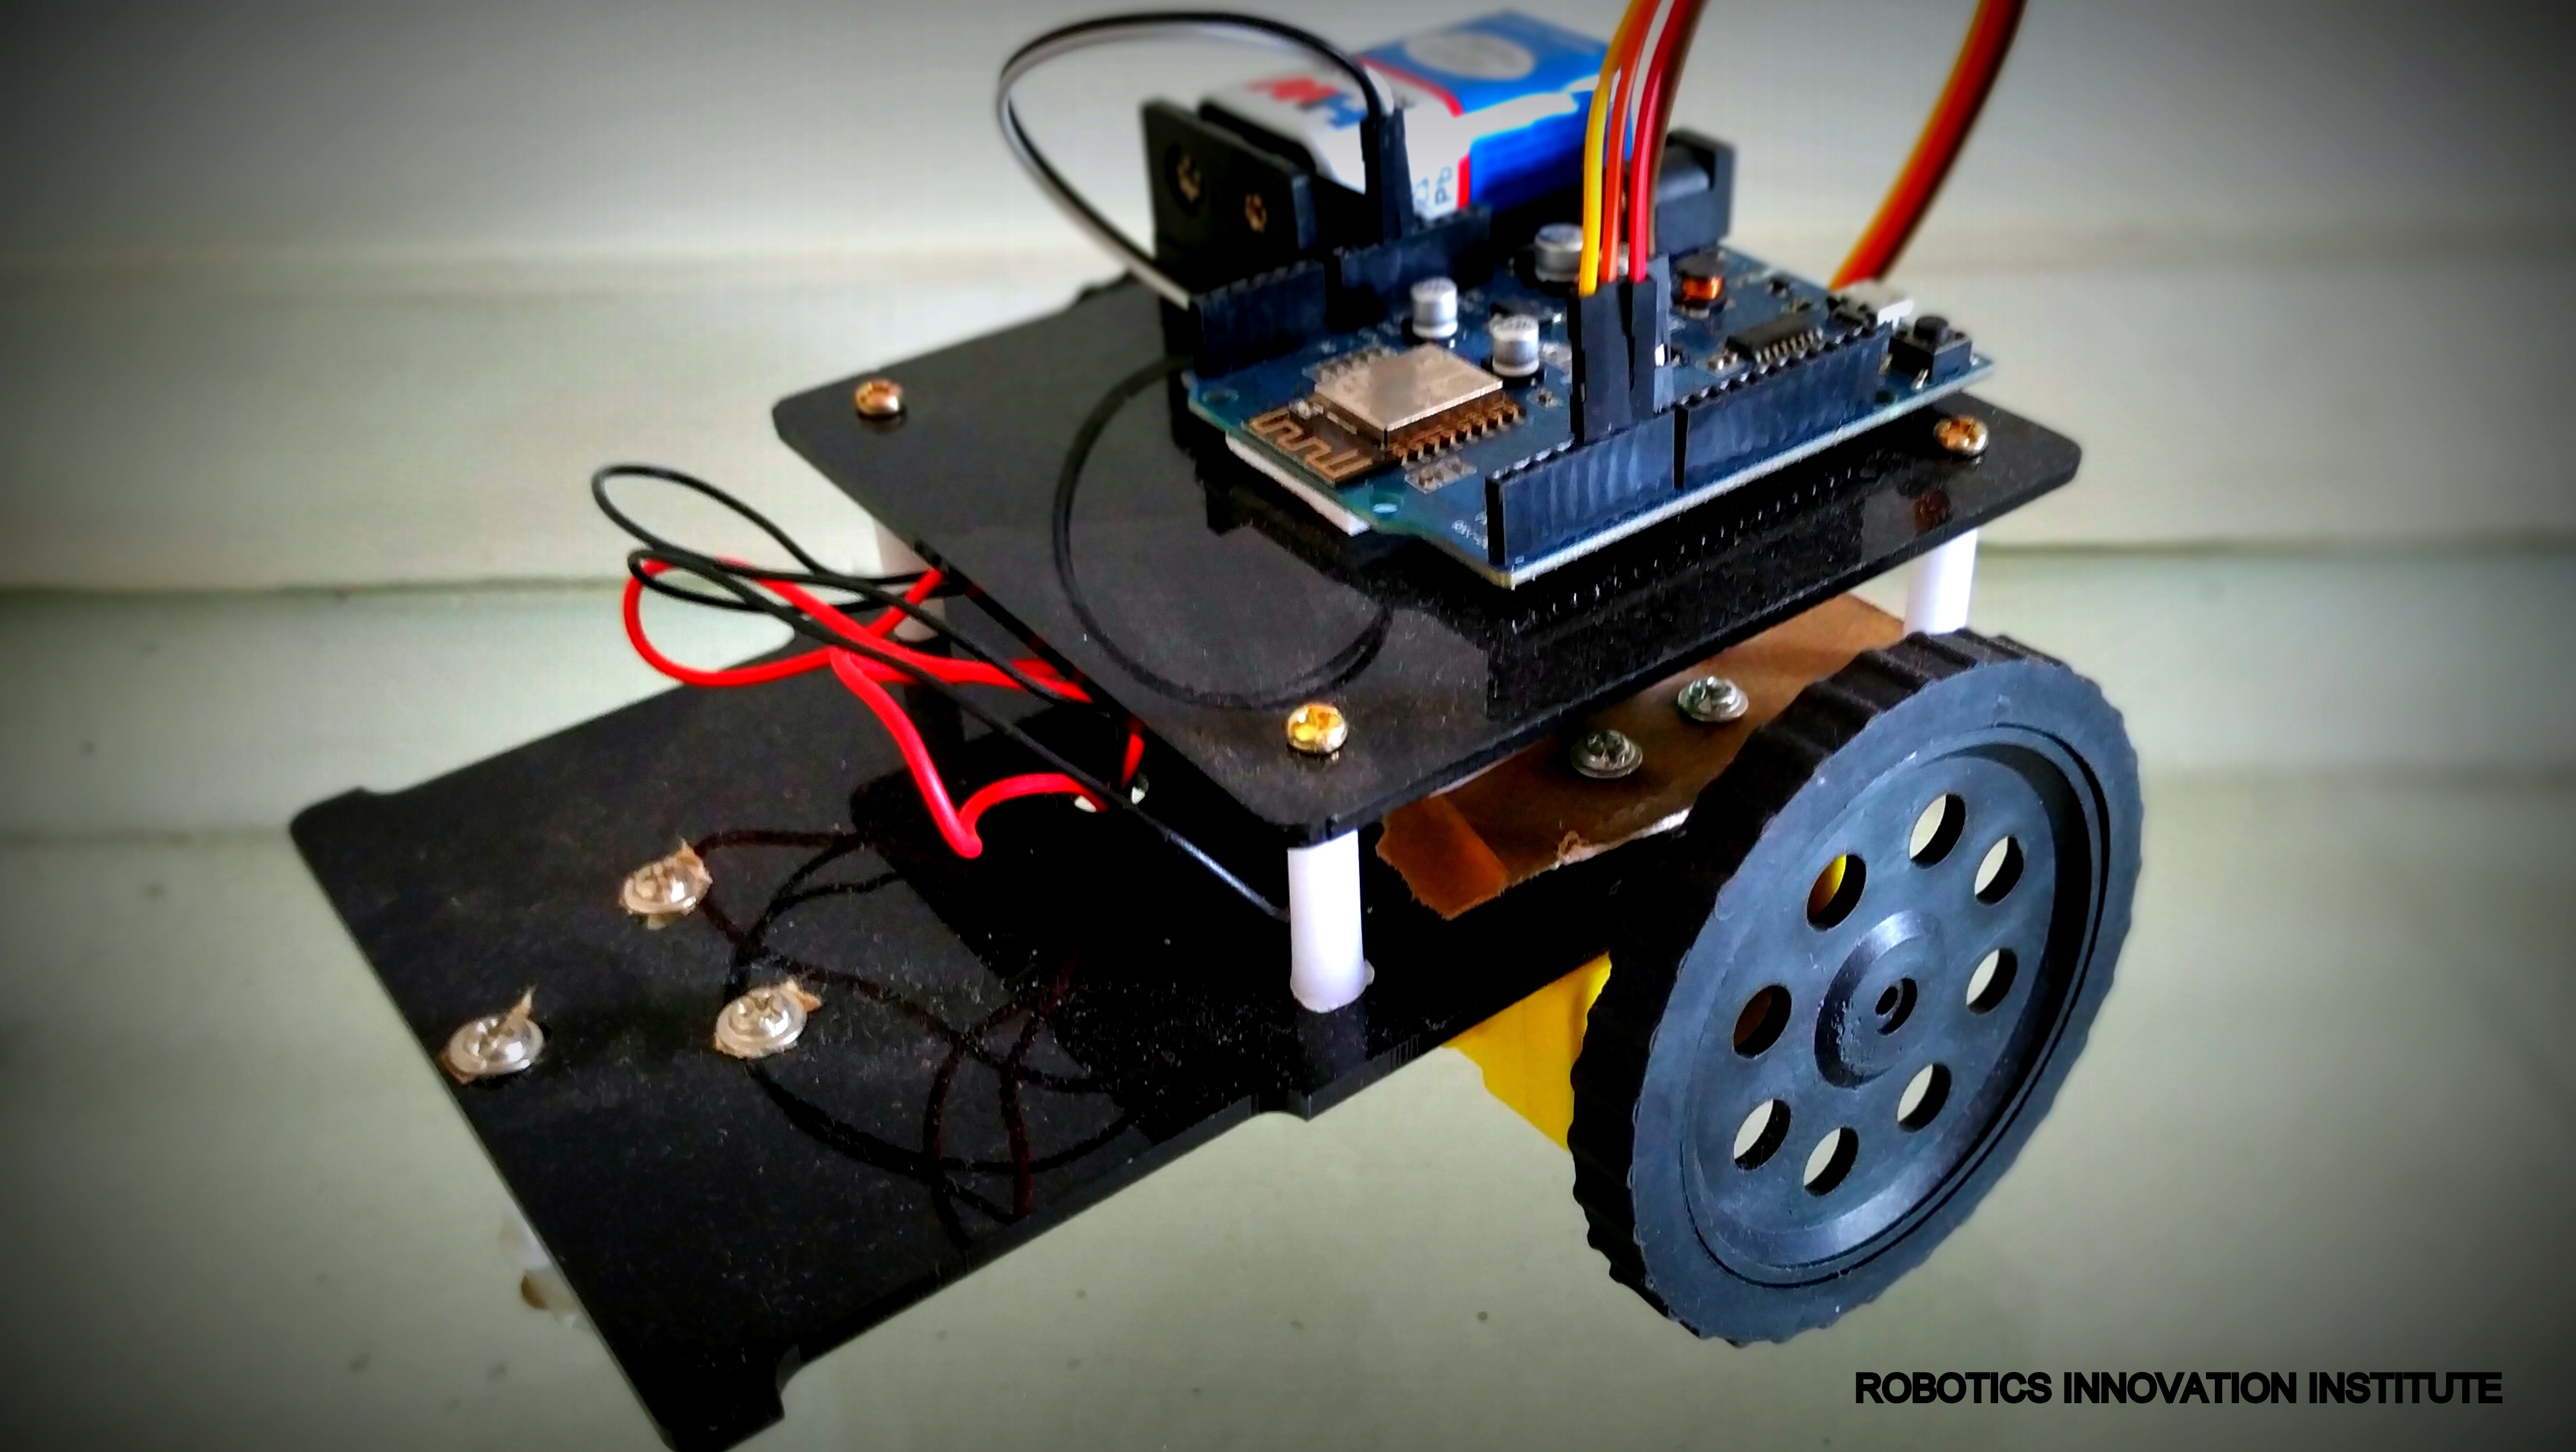
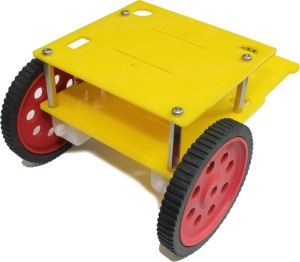
Robot Chassis
You can use any Robot Chassis availble in the market to mount all the parts use in this project
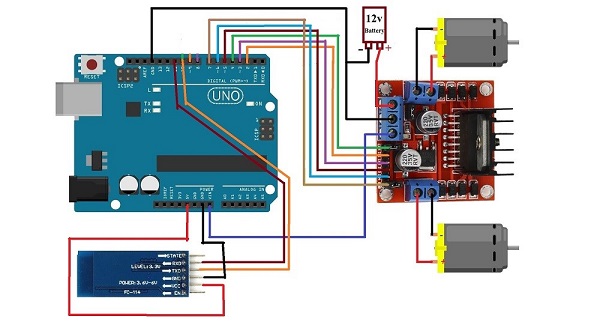
Circuit Diagram
Limitations
As the range of the Bluetooth Communication is limited (a maximum of 10 meters for class 2 devices for example) the control range of Bluetooth Controlled Robot is also limited.
Make sure that sufficient power is provided to all the modules, especially the Bluetooth Module. If the power is not sufficient, even though the Bluetooth Module powers on, it cannot transmit data or cannot be paired with other Bluetooth devices.
Application
Low range Mobile Surveillance Devices
Military Applications (no human intervention)
Assistive devices (like wheelchairs)
Home automation