A humanoid robot is a robot with its overall appearance based on that of the human body. The robot is controlled by an Arduino Uno R3 controller module which has an inbuilt Servo Controller and Bluetooth module to control and operate multiple servo motors remotely. This robot is able to follow the instructions written in the Arduino controller which makes the robot autonomous. A computer software application can also be used to operate this robot from a graphical interface.
- This Robot has Bluetooth interface for wireless control
- Controls multiple Servo Motors as per instructions written in software
- Robot movement can be controlled by varying Servo Motor speeds
- Robot can be operated from a graphical user interface software on a PC
This is an excellent project to take your first steps towards the field of Humanoid Walking Robots.
Hardware Requirement
- Microcontroller: Arduino Uno R3 based Bluetooth + USB 18 Servo Controller, USB Cable
- Motor: Metal Gear Servo Motor MG996R
- External Power: Lithium Ion Battery 7.4V 2200mAH
- Hardware: Humanoid Robot Chassis
Software Requirement
- Arduino IDE
Hardware Specification
Arduino Uno R3 based Bluetooth + USB 18 Servo Controller
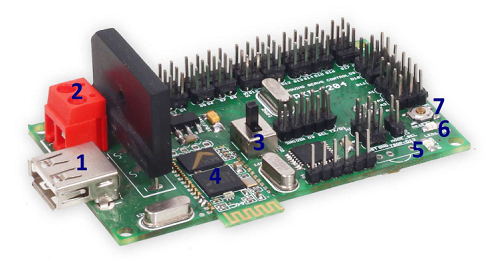
This Arduino Uno R3 variant is an ideal USB servo controller for wireless applications. It can be operated wirelessly on Bluetooth or through a USB connection. It can receive signals from any device like PCs, Laptops, Mobile phones with Bluetooth. It is ideal for making Autonomous and PC-based systems which run over hobby servo motors.
The software helps to develop complex sequences in real-time on hardware like robotic arms, walkers, bipeds, and any other servo-controlled system. It also generates Arduino-based code for the developed sequence which can be deployed on the controller board.
Features
- Easy application programming using open source IDE
- Bluetooth interface for wireless control of robots
- Controls up to 18 hobby servos from PC and Microcontroller
- Ready Library for most sensors and application modules
Servo Motor
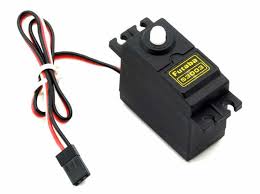
A servo motor is an electrical device which can push or rotate an object with great precision. It is made up of a simple motor which runs through a servo mechanism.
Hardware Features Servo Motor MG996R
- Operating Voltage: +5V typically
- Torque: 2.5kg/cm
- Operating speed: 0.1s/60°
- Rotation: 0°-180°
- Weight of motor: 9gm
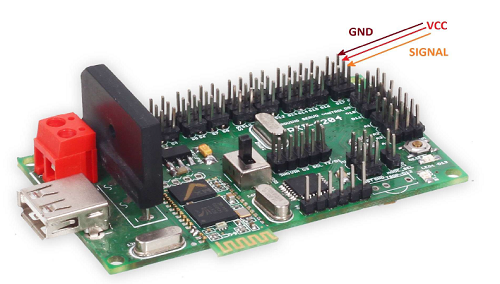
How to connect Servo Motor to Controller
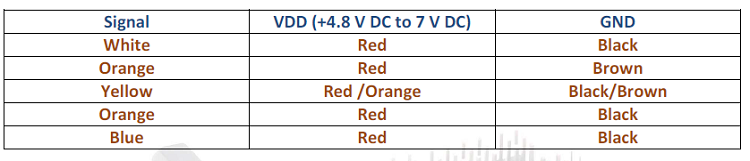
All standard servo motors have a 3-wire connector. Two wires are for Power (VDD +4.8V to 6V, and GND). The third wire is for the PWM signal (usually Orange or Yellow).
How to use a Servo Motor
To make the motor rotate, we power it with +5V and send PWM signals. A PWM signal with a frequency of 50Hz (20ms period) is required. The On-Time dictates the position: 1ms On-Time sets the motor to 0°, 1.5ms to 90°, and 2ms to 180°.
Applications
- Used as actuators in many robots like Biped Robots, Hexapods, and robotic arms.
- Commonly used for steering systems in RC toys.
- Less weight, hence ideal for multi-DOF robots like humanoids.
Robot Chassis
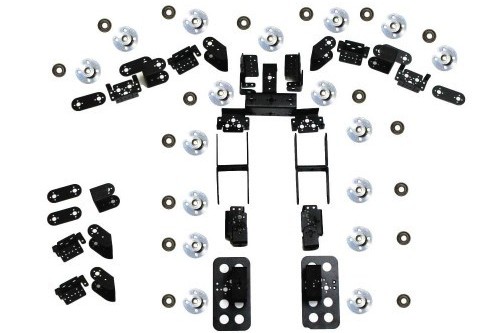
You can use any Humanoid Robot Chassis available in the market that fits standard metal gear servos.